
Seam Strength and Reinforcement in Horse and Rider Products
Seam strength influences whether horse and rider products remain securely joined during movement, handling and repeated use. A durable outer fabric cannot compensate for a seam that opens at a pocket, separates beside a fastening or restricts the stretch needed for riding.
For equestrian brands and wholesale buyers, stitching deserves the same attention as fabric composition, fit and appearance. The important questions concern how the product carries force, where movement occurs and which parts need additional support.
This guide explains seven practical checks for assessing seam strength, selecting reinforcement and approving construction before bulk production. It complements the broader horse gear materials and construction guide by focusing on the connections between individual components.
Table of Contents
- Understand What Seam Strength Actually Measures
- Map Stress Points Before Choosing Reinforcement
- Match Thread, Needle and Stitch to the Material
- Reinforce Attachments Without Creating New Weak Points
- Balance Seam Strength With Movement and Comfort
- Test the Construction and Understand the Failure
- Control Sewing Quality Throughout Production
- Frequently Asked Questions
- Develop Your Next Equestrian Product
1. Understand What Seam Strength Actually Measures
Seam strength generally describes the resistance of a sewn connection to an applied force. A laboratory test defines how the specimen is prepared, loaded and assessed, allowing the result to be interpreted under known conditions.
However, a seam can become unacceptable in several ways. The sewing thread may break, the material may tear beside the stitching, or yarns within a woven fabric may shift apart. These outcomes should not be treated as identical defects.
AMANN’s explanation of seam stability distinguishes seam breaking strength from seam slippage and identifies fabric, sewing thread and sewing parameters as important influences. Its guidance also explains that yarn slippage depends primarily on the fabric structure.
This distinction changes the corrective action. Replacing the thread may help when thread failure is the limiting factor, but it does not automatically solve yarn movement in a loosely constructed woven fabric.
Seam strength should therefore be assessed alongside opening, appearance and usability. A connection that withstands a high force but develops an unacceptable gap during ordinary movement may still fail the product specification.
2. Map Stress Points Before Choosing Reinforcement
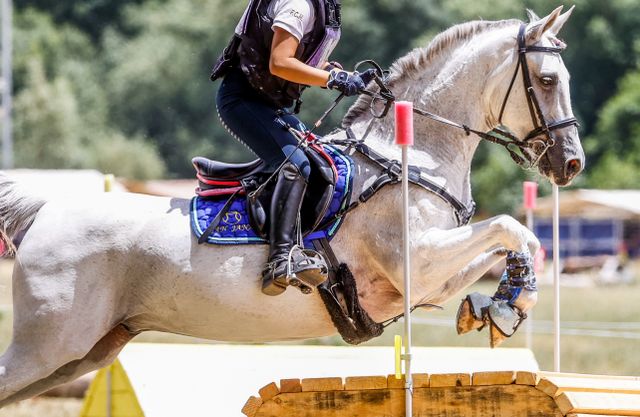
Start by identifying how each product moves and where its attachments are pulled. The direction of force matters as much as its location: a fastening may pull across a stitched line, lift away from a panel or repeatedly bend the material around an edge.
For horse products, examine rug closures, saddle pad loops, binding joins and connections between different materials. For rider apparel, review seat seams, waistbands, pocket openings and areas that flex during mounting or riding.
| Product area | Main construction concern | Useful development check |
|---|---|---|
| Saddle pad loop attachment | Concentrated force entering a layered panel | Review the supporting layers and attachment construction |
| Rug fastening tab | Pulling and repeated bending around the attachment | Assess the complete tab, backing and shell assembly |
| Breeches seat seam | Extension and repeated movement | Check seam opening and recovery in riding positions |
| Glove finger junction | Curved construction and hand movement | Assess bulk, stitch formation and flexing |
| Pocket opening | Repeated pulling at the ends | Review reinforcement position and surrounding fabric |
| Fly mask binding | Joining mesh to a more stable edge | Check edge capture, flexibility and surface smoothness |
Do not assign the same seam strength requirement to every connection. Decorative topstitching, quilting and a functional strap attachment serve different purposes.
A simple construction drawing should identify critical seams and their intended function. This makes sample discussions more precise and helps the manufacturer concentrate development work on the connections that matter.
3. Match Thread, Needle and Stitch to the Material
Seam strength comes from the assembled construction, so thread selection should be coordinated with the fabric, needle and stitch formation. Choosing the thickest available thread is not a reliable substitute for development testing.
Thread and Needle Compatibility
Ask for the thread composition, construction and size to be recorded in the specification. The selected needle must accommodate that thread while forming consistent stitches through the actual material stack.
Inspect trial seams for enlarged holes, damaged yarns, skipped stitches and inconsistent tension. A setup that works on a single fabric layer may behave differently where binding, webbing or reinforcement creates a thicker junction.
Needle point selection also depends on the material being sewn. Textile and leather operations should not share settings simply because the products look similar. Confirm the setup on production materials before approving it.
Stitch Formation and Density
Stitch type describes how the threads form a stitch, while seam type describes how the material layers are joined. Both belong in a useful production specification.
Lockstitch, overedge, chainstitch and flatseam constructions provide different combinations of joining, edge control and extension. The sportswear stitching guide introduces these options and their applications.
Increasing stitch density can improve some constructions, but an unlimited increase should not be assumed to improve seam strength. Inspect the material for perforation damage and evaluate the finished seam.
Record density as a defined number of stitches per centimetre or inch, together with the measurement location. Avoid vague instructions such as “tight stitching,” which can be interpreted as density, tension or appearance.
4. Reinforce Attachments Without Creating New Weak Points
Reinforcement should help transfer force into an appropriate area of the product. Its effectiveness depends on the supporting material, attachment dimensions and direction of loading, as well as the visible stitch pattern.
Bartacks, Stitch Patterns and Backing Patches
Bartacks can provide local reinforcement at suitable pocket ends, tabs and similar stress points. Their length, width and density should suit the material rather than being copied from an unrelated sample.
Box or box-and-cross stitching may be considered for certain strap attachments, but the pattern alone does not establish seam strength. The webbing overlap, backing material, stitch placement and complete assembly still require evaluation.
Where a lightweight shell cannot adequately support an attachment, a backing patch may help spread the force. Its size and positioning should be developed with the attachment rather than added after the sample fails.
Binding and Layered Products
Binding needs to capture the intended layers consistently, particularly around curves and changes in thickness. Attractive stitching on the outside can conceal a missed layer underneath.
In saddle pads, quilting, perimeter binding and loop attachments perform different jobs. The saddle pad construction guide provides context for evaluating these features together.
Reinforcement should improve seam strength without leaving abrupt, bulky edges that interfere with use. Where a component is intentionally designed to release, strengthen only according to its approved design requirements; reinforcement must not defeat the intended release function.
5. Balance Seam Strength With Movement and Comfort
A seam can be strong in a tensile test and still be unsuitable for a product that needs to stretch, bend or sit comfortably against the body. Development should therefore consider extension, recovery and surface feel alongside breaking force.
Riding Breeches and Apparel
Breeches need construction that accommodates the intended riding posture. Review the seat, rise, waistband and inner leg while the wearer bends and moves, checking for seam opening, restriction and excessive bulk.
If a seam becomes highly tensioned during an ordinary movement, investigate the pattern and fit as well as the stitching. A construction change alone may not correct insufficient room or an unsuitable stretch direction.
The horse riding breeches design guide explains how panel placement and fit relate to riding movement. These decisions should be settled before seam strength is used as the sole basis for approving a sample.
Gloves and Lightweight Horse Accessories
Glove seams should accommodate hand movement without creating bulky junctions between the fingers. Assess the assembled glove because a straight test specimen cannot reproduce every curved connection.
For fly masks and ear bonnets, seams join materials with different flexibility and edge behaviour. Binding or backing that stabilises a connection should not unnecessarily stiffen a contact area.
The fly mask materials guide and ear bonnet materials guide offer useful background for these combinations. Across both categories, suitable seam strength must be balanced with the intended fit and flexibility of the complete product.
6. Test the Construction and Understand the Failure
Seam strength testing should use an agreed procedure and a clearly identified specimen. A report stating only “passed” provides little value unless the requirement, method and tested construction are documented.
Choose a Method Within Its Scope
ISO 13935-1 describes a strip method for determining the maximum force to seam rupture. ISO 13935-2 describes the corresponding grab method. Both address loading perpendicular to straight seams and are principally intended for woven textile constructions, with scope limitations that must be checked.
For seam slippage in suitable woven fabrics, ISO 13936-1 addresses resistance to yarn movement using a fixed seam opening method. This assesses a different characteristic from simply determining the force at seam rupture.
Ask the laboratory to select an appropriate assessment for coated materials, leather, curved seams or finished attachments. An adapted procedure should be identified as such rather than presented as unmodified compliance with a standard.
Record More Than the Maximum Force
A useful seam strength report should identify the material stack, thread, seam construction, specimen orientation and conditioning. It should also describe whether failure involved thread breakage, fabric damage, slippage or another mechanism.
For example, suppose two rug-tab samples use the same thread. One fails when its stitching breaks; the other pulls a section of shell fabric away with the stitches intact. The second result points towards the supporting construction, not automatically towards a stronger thread.
Where relevant, discuss assessment after an agreed cleaning procedure or repeated movement. Define the procedure and acceptance criteria in advance. Results from different test methods should not be compared as though their numerical values were interchangeable.
7. Control Sewing Quality Throughout Production
A successful sample demonstrates one approved construction. Consistent bulk production requires the same important details to be recorded, communicated and checked.
The technical specification should include material references, seam drawings, seam allowance, thread details, stitch density and reinforcement dimensions. Add photographs where words alone could leave uncertainty about the required construction.
Use the sample approval checklist to organise revisions and retain an identified reference sample. If a material, thread or attachment changes, review whether the existing seam strength evidence still applies.
Inspect sewing during production, while adjustments can still be made. Pay particular attention to curves, seam intersections and thickness changes, where inconsistent feeding or incomplete layer capture may be less obvious from the outside.
Final inspection should include both faces of accessible seams. Check for skipped stitches, unsecured ends, uneven allowances, damaged material and reinforcement placed outside its intended position. A neat surface does not independently establish seam strength.
Finally, define which observations require repair, rejection or further investigation. Keep measurements and test records connected to the relevant production batch so that repeat orders can reproduce the approved construction more reliably.
Frequently Asked Questions
Does Double Stitching Always Improve Seam Strength?
No. A second row can help in an appropriate construction, but its benefit depends on spacing, material condition and how force reaches the seam. Two visible rows do not establish twice the strength, and both rows must engage the intended layers.
What Is the Difference Between Seam Slippage and Broken Stitching?
Seam slippage involves yarns moving within a woven fabric near the seam. Broken stitching involves failure of the sewing thread. Identifying which problem occurred helps determine whether to review the fabric, thread or broader construction.
Should Every Strap Attachment Use Box-and-Cross Stitching?
No single stitch pattern suits every attachment. The connection should reflect the strap width, supporting material, available overlap and expected loading direction. Test the assembled attachment against a defined requirement rather than approving it from its appearance.
Can Washing Affect Seam Strength?
Cleaning can change materials and their interaction within a seam. Where the product is intended to be washable, assess relevant construction properties after a clearly defined care procedure. Also review distortion, puckering and changes in surface feel.
How Can Buyers Specify Seam Strength Before Ordering?
Identify the important seams, intended use and acceptable failure criteria, then agree on appropriate tests with the manufacturer or laboratory. Include construction drawings and approved samples. A numerical target without a method or specimen description is incomplete.
Develop Your Next Equestrian Product
Reliable seam strength depends on compatible materials, suitable reinforcement and controlled sewing. Evaluating these together helps brands identify weaknesses during sampling and establish clearer requirements for repeat production.
For custom horse and rider products, Bushi Sports® can discuss your drawings, material preferences, reinforcement details and private-label requirements. Share the intended application and any existing specifications so the sample discussion addresses the construction your product needs.
To discuss your sample or custom order, use the contact page, send details through WhatsApp, or email info@bushisports.com. You can also view the company location on Google Maps and connect with Bushi Sports® on LinkedIn.
Follow company and product updates on Instagram, Facebook, X and Threads. For additional content, explore Pinterest, watch videos on YouTube and TikTok, or read further articles on Medium.